
Dinosaurs Aren't Extinct -they are just quite tiny and standing on my workbench!

Behind the scenes - a step by step peep at the making of the dinky dinos...
The process started with me opening a tiny packet of silver clay and beginning to soften the lump with my hands to mould and shape it. I always try to get everything out on my work bench first as the working time isn’t very long and as each pack is so expensive it is important not to let any go to waste. But I am sure I am not the only person who seems to develop workbench blindness and inevitably each time I make something I hunt for a tool - only to discover it was there on the workbench all along!
For the dinosaurs I used Project X Fine Silver Clay., I use a mixture of Project X and Art Clay in my work, depending on what I am making. In this case I wanted to utilise the high shrinkage of Project X Clay to get smaller dinosaurs.
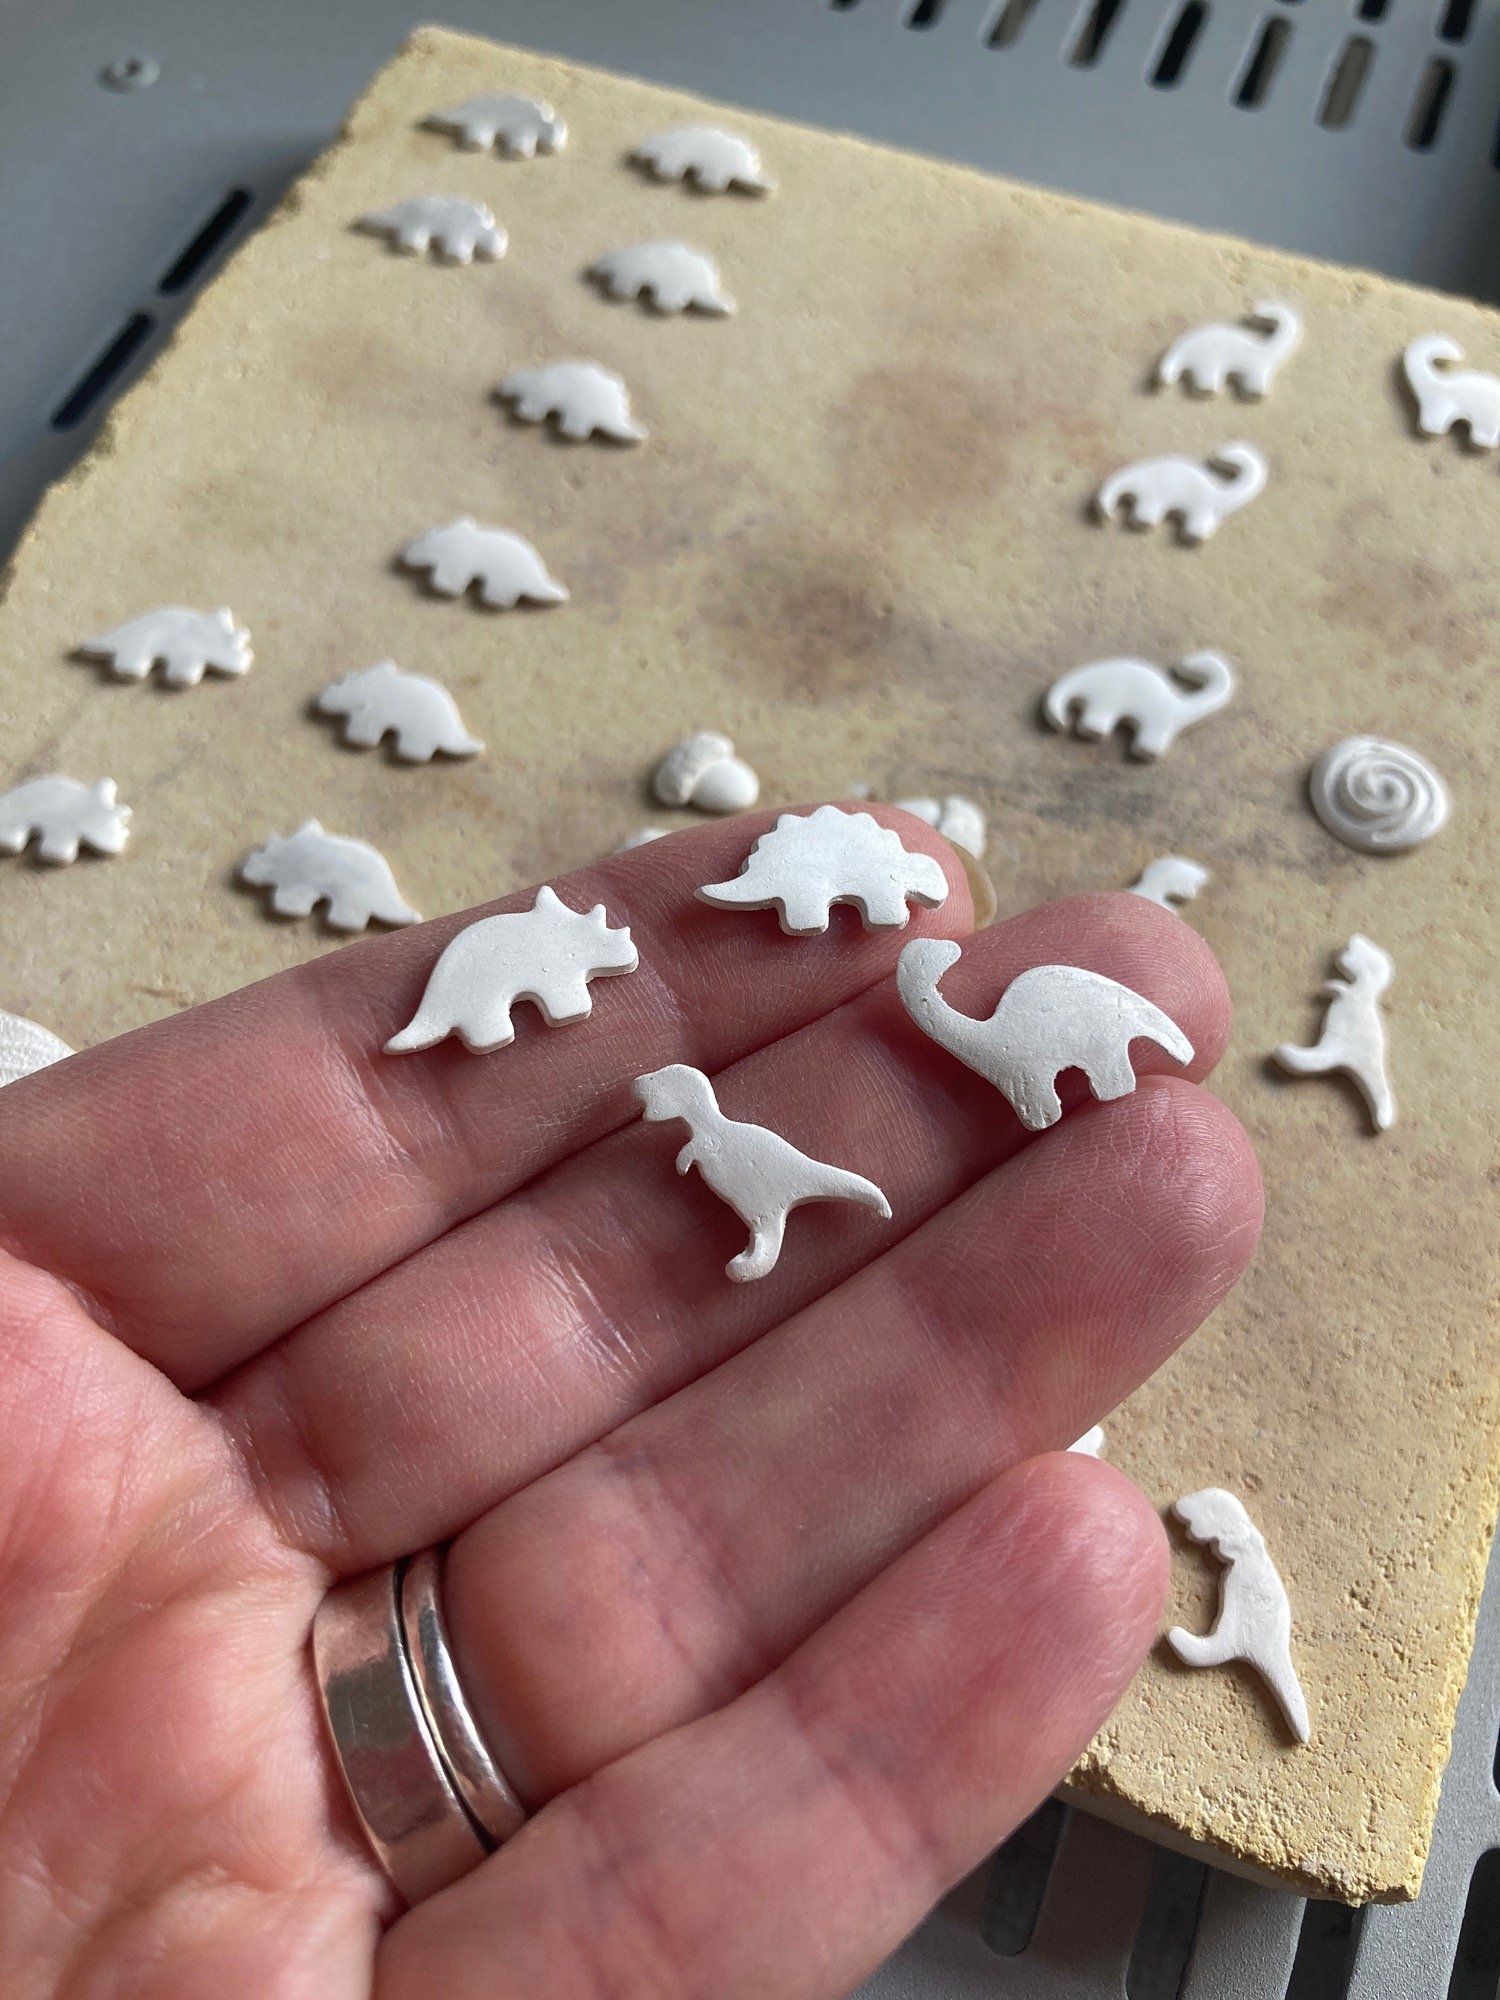
Once the clay was more malleable I rolled it out to the required thickness, using coloured spacers (my spacers were from Metal Clay) .to help keep the depth consistent before using my tiny dinosaur cutters to create pairs that were as identical as possible. With some designs I make my own stamps or use a needle tool to cut out the shape freehand.
Here I am cutting out a Stegosaurus! The edges needed a lot of refining to get a neat shape after the photo.

Can you spot the tiny dinosaurs glowing red?
Then I let the dinosaurs dry out, turning them occasionally so they didn’t get stuck to the mat or warp out of shape. Afterwards I spent a long time sanding and filing the edges to make them smooth. At this stage the pieces were quite fragile and as I sanded any rough edges this is when the dinosaurs were at their most delicate - sadly a few limbs were lost along the way! However those bits can get ground down later to be mixed with water and will be used as paste for other projects - so nothing gets wasted.
Once I was happy the dinosaurs looked as good as possible the firing could take place in my small kiln.
The silver clay dinosaurs went into the kiln, reaching 700°C where they were held at that heat for about 10 minutes. You can see through the window how they literally glow red hot with the heat.
The kiln burnt the organic binder away, leaving behind cute, solid silver dinosaurs. 🦕 🦖
It felt exciting opening the door to see what survived.

After firing the silver actually looked white, in fact silver only starts to look shiny once you begin to burnish it.
The first step after firing was to brush it with a wire brush – not good when wearing nail polish! 🙄 Followed by lots and lots of polishing to get a high shine.
I sought the opinions of some palaeontologist pals on the shapes and which dinosaurs they most closely resembled. I still remember being fascinated by dinosaurs as a child if you know any children they will quite possibly have the best knowledge going. However, we decided that I have crafted I have four different dinosaurs. – the Roarsome T-Rex, 🦖 a spiny Stegosaurus, a Diplodocus with its iconic shaped head 🦕 and a horned Triceratops. . (If you want to find out more about any of these then The National History Museum in London is a good place to start, they have lots of info online too.)
As these dinosaurs were destined to become stud earrings I finally had to solder the earring backs on using a small blow torch, before I cleaned and polished them once more, to get the pretty look you see below.
Do you know anyone that loves dinosaurs? These could make the perfect gift for them, or perhaps you like the idea yourself. I have some matching pairs in stock online or you can order your very own mismatched pair, deciding which two dinosaurs to feature. .
I hope you enjoyed reading about the process.
Esther 🦖

Diplodocus
The shape of this huge neck is distinctive, it must have had strong muscles to hold that up! 🦕

Stegosaurus
This slow-moving plant-eater has distinctive bony plates along its body - I’m not sure what they were for!

Triceratops
This plant-eating dinosaur probably used its horns for defence against fearsome predators.

T-Rex
This infamous carnivore was one of the most fearsome creatures that ever roamed the planet. 🦖
Comments